Monday, November 30, 2009

Fish in parchment


So so easy and very very tasty. It only takes about 25 minutes to bake, so is perfect for a busy weekday dinner. Everything gets steamed together in essentially a paper bag.  The most important advice is to make sure you use flavours that marry together well. The other upside is that it is also low in fat... well I suppose it depends on how much butter you add to the package.

I haven't given exact amounts of ingredients to use as it is up to your taste how much you want to use. However it is best to make individual portions so each person has their own bag to open.

Fish in Parchment
Fish Fillets (Any fish can be used. I used tilapia but salmon would also work well)
New Potatoes
Spring Onions
Carrots
Asparagus
Fennel bulb and feathers
Butter
Olive Oil
Lemon
Roughly Chopped Parsley
S&P
White Wine Vinegar


Finely slice the potatoes, carrot and fennel finely (3-4 mm). Retain the fennel feathers to add with the vegetables at a later stage. Cut the asparagus and spring onions into 1cm pieces and the lemon into medium wedges.


Prepare a sheet of parchment big enough to hold the ingredients and place on a baking sheet. Begin by layering the potatoes followed by the fennel on one half of the parchment paper and season with S&P. Continue to layer the remaining vegetables on top and add some thin slices of butter before finishing off with the fish fillets. Season with S&P and drizzle with approx 1tsp of white wine vinegar and some olive oil. Add 2 wedges of lemon to the fish and  sprinkle with parsley. Fold the remaining half of the parchment paper over the mound of ingredients and roll up the edges to seal them in. Secure with a stapler. Repeat this with each portion you require.


Bake on a baking sheet in a preheated oven at 350 for 20 -25 minutes. Remove from oven and serve the parchment package on a plate. Cut a hole into the top of the bag and pull open (Be careful of the steam) and enjoy!!!


Wednesday, November 25, 2009

Comfort food

So now I have a little more time on my hands my culinary mind has gone into overdrive. There are new recipes that I want to experiment with and at present I am trying to do new twists on classic recipes. Last night I had planned to make an Italian sausage lasagna, exchanging the tomato sauce for a roasted red pepper sauce and adding spinach to the bechamel sauce. I had some left over homemade pasta that spent the day happily thawing out on the kitchen counter, therefore all of last nights dinner was homemade. Not bad considering I came off nights that morning.

I love leftovers, especially when you can make a meal out of them. I have some pork belly in the freezer and I plan to make some duck confit before Christmas. I am hoping that I can make a cassoulet with these ingredients using an altered version of my homemade baked beans. I can't wait to make this, but firstly lets get the recipe for last nights feast..

Italian Sausage Lasagna


Italian Sausage Meat
1 Large Onion
5 Red Peppers
2 Garlic Cloves
2 Sprigs Thyme
1 Can Tomatoes
Olive Oil
Salt & Pepper
Milk
Cheese (Parmesan)
Nutmeg
2 Tbsp Flour
Knob of butter
Spinach
Lasagna Sheets


Firstly cut the peppers in half and arrange skin side up on a baking sheet. Drizzle with olive oil, salt and pepper and put under a hot grill until the skins turn black. Make sure you keep an eye on them as they turn very quickly. Remove from the grill and carefully peal off the blackened skin and remove the seeds. Slice finely. Dice the onion finely along with the garlic, add these to a well oiled pan and simmer until translucent, then add the can of tomatoes and the red peppers. Bring to a simmer, season with salt and pepper and blitz into a smooth sauce. Lastly add some thyme leaves.


Fry the sausage meat until brown and drain off any excess fat. Add the roasted pepper sauce to the sausage and simmer for 5-10 mins. Meanwhile you can make your bechamel sauce. In a pan set over a medium heat make your rue. Melt the butter and add the flour. Stir until you get a thick paste, then start to whisk in your milk slowly until you get the desired thickness of sauce. (Make sure you keep stirring the sauce otherwise you may get lumps, the paste should dissolve into the milk). Add a cup of grated cheese to the bechamel sauce. You can use whatever cheese you like, I used parmesan and cheddar. Finally wilt some spinach, squeeze out any excess water, chop finely and add to the cheese sauce. Season with salt and pepper and a pinch of nutmeg.


Now its time to assemble the lasagna. Grease a deep oven proof dish to stop the pasta sheets from sticking to it.  Place a layer of lasagna sheets in the bottom of the dish, layer with the cheese sauce, then the sausage mixture, then another layer of lasagna sheets and so on. Keep doing this until finished. I like to finish with a layer of lasagna sheets, followed by a layer of the cheese sauce and then sprinkle the top with parmesan to get a nice crunchy finish.

The last step needed now is to bake the lasagna, prior to serving. (Unbaked lasagna's will keep in the fridge for a  a couple of days before baking. You can also freeze it and when needed thaw and then bake). To bake the lasagna pre-heat the oven to 350 and bake for approx 30 -40 mins or until the top turns nice and brown. Serve with a nice spinach salad.


I have some roasted red pepper sauce left over which is going into the freezer to create another dish, maybe ratatouille!!!


Sunday, November 22, 2009

Bread

I had been looking everywhere for a decent recipe for bread that could be made without a bread machine. I searched the internet, watched untold cooking programs and read copious amounts of magazine articles. Many of the recipes produced a lovely tasting bread but they were either too crusty or the bread laid heavy in your stomach. So, after trying various recipes I found the perfect bread dough, an Amish recipe. I have played around with the ingredients to get the taste I like. When I first made it, it was far too sweet and although it tasted good toasted, it didn't work for me as bread. I also added a mixture of white flour and wholemeal flour with the addition of some grains to make me feel like it was healthier!!! This bread has a nice soft texture with a light crust.

I have three reliable bread doughs in my recipe folder, pizza dough, Amish dough and sweet dough. The pizza dough can easily be made into foccacia with the addition of more water, the Amish dough can be made into a variety of savory breads and the sweet dough (which is used for my cinnamon rolls) can be made into a fruit loaf with the addition of dried fruit and orange peal. As long as you stick to the basics you can pretty much add anything to the dough.

This bread recipe is my adapted version.

Bread Dough

2 cups warm water (110 degrees)
3 Tbs white sugar
1 1/2 tablespoons active dry yeast
1 1/2 teaspoons salt
1/4 cup vegetable oil
6 cups bread flour  (half of white bread flour & half wholemeal)
1/4 cup mixed cereal grain

Using a large bowl, dissolve the sugar in the warm water. After the sugar is dissolved, stir in the yeast, and allow the mixture to proof until yeast resembles a creamy foam. Into the yeast mixture, add the salt and the oil. Gradually mix in the flour, only one cup at a time and the grains. On a lightly floured surface, knead the dough until smooth and place in a well oiled bowl, turning the dough to coat. Cover the bowl with a damp cloth and allow to rise until doubled in bulk. This usually takes about one hour. After the dough has finished rising, knead for a few minutes, and divide in half. If you have a scale, weigh out the pieces to ensure even baking. Shape each piece of dough into loaf shape, and place into two well oiled 9 by 5 inch loaf pans. Allow the dough to rise for thirty minutes to an hour, or until dough has risen about one inch above the pans. Bake the loaves at 350 degrees for about thirty minutes, until golden brown on top. Allow to cool and turn out of pans. Keep in a sealed plastic bag to keep fresh, thats if you don't eat it all!!!

Wednesday, November 18, 2009

Back to work

I have thoroughly enjoyed having my days of this week, I have finished inputting all the recipes into the book and I have made a list of new dishes that I want to experiment with. I feel proud of what I have achieved. Yesterday I celebrated my achievement by making some cinnamon buns, which I can take to work each morning for the next few days (It will remind me of my pleasurable days off). At first I was a little disappointed with the filling of my cinnamon buns. I didn't stick to the original recipe and I found it a bit dry, but today I changed my mind. After popping one of these iced buns into the microwave for 30 seconds, the icing melted into the bun making it more gooey and moist. The recipe I am going to share with you is the original recipe with the original filling recipe which I advise you to follow. The buns turn out much more gooey if you do.

Cinnamon Buns/Rolls
For the bread:
1 cup milk
1/2 cup water
1/2 cup unsalted butter

4 1/2 cups flour (unbleached, whole wheat, or a mix)
1 package instant yeast
1/4 cup sugar
1/2 teaspoons salt
3 eggs

For the filling:
1/3 cup butter
1/2 cup all purpose flour
1/3 cup demerara sugar
1 1/2 tbs cinnamon

Heat the milk, water, sugar and butter until butter is melted. Check temperature. Depending on the temperature, let cool to 120F. Carefully beat in eggs. Mix 2 cups of the flour, yeast, and salt. Mix into the milk mixture. Stir in the rest of the flour, 1/2 cup at a time. Beat well after each addition. When the dough pulls together, (it will form a soft ball) turn it out onto a floured surface and knead until smooth and elastic. This should take about 5 minutes. Let rise for 1 hr – 1hr 1/2. When dough has almost doubled punch down an push out onto a baking sheet. To make the filling mix the butter flour and sugar together to create a crumble mixture. Sprinkle the dough with ground cinnamon, raisins (optional) and crumble mixture. Allow to rise for 10 mins. Roll dough onto itself like a swiss roll Cut into twelve equal pieces and lie on a grease proofed baking dish. Bake at 400 degrees for 10 to 12 minutes. When cooled ice with icing sugar mixed with cream or water. I like to ice them when there still a bit warm as it drips into the roll and makes it gooey. I also make non iced ones but coat the tops of the rolls with melted apricot jam before baking.


Tuesday, November 17, 2009

Curry, Beer and Wii

Ian and I both had the same idea!! I had decided to make curry for dinner unbeknown to Ian and was just on my way home when I recieved a text from him saying, "Fancy a Wii night, beer, games and snacks". Excellent, so last night we had curry, beer and games. It was awesome.

Prior to this text I was wanting to make a nice dinner for Ian as he has been helping me out so much in taking and processing the photos for me book. He had also helped me with the new blog layout and spent most of his weekend doing it. So it was time for me to spoil him. I bought him a single red rose to show him my appreciation and started making him a gourmet curried meal. I had been toying with the idea of making a curried cauliflower soup for a while and thought a small bowl of this would be welcoming as a starter, followed by chicken madras and pilau rice. I am not too keen on cauliflower as I find it tasteless unless I eat it raw with a dip or have it in a piccalilli. I was determined to change my opinion of this humble vegetable.


I had a rough idea of what I wanted to put in the recipe, but I was unsure as to use coconut milk or cream. I didn't want it too sweet or too creamy, so I did a little taste test and took some of the soup and added the coconut milk, it tasted awesome. So I used a 1/4 cup in the main soup pan and thinned it out with regular milk. I finished the soup off with a small handful of chopped cilantro and served it with a spiced popodum. The soup was mild in flavor of both cauliflower and curry and worked well with the crunch of the popodom . It was served  alongside small bowls of  Indian tomato salsa and mango chutney. We scooped the soup up with the popodum not too dissimilar to a vegetable puree dip. It was gorgeous, I love picky food, so I was in heaven.

Curried Cauliflower Soup


1 Cauliflower cut into florets
1 medium carrot
1/2 White onion
3 Garlic Cloves
4 Cardamom Pods crushed
1 Tsp Madras Curry Paste (Any Indian curry paste can be used, Madras is my favorite)
1 Small potato
1Tbsp Butter
1 Tbsp Oil
Turmeric Powder
Salt & Pepper
2-3 Cups Chicken Stock
1/4 Cup Coconut Milk
Milk
Small handful of cilantro

Firstly dice the potato into small cubes and place in a roasting tin with the cauliflower and garlic. Sprinkle with the cardamom, turmeric, salt and pepper, then drizzle with oil. Roast in a preheated oven at 400 degrees for approx 20 minutes until the cauliflower turns golden brown. I like to keep the garlic cloves whole as they take on a nice subtle flavor when roasting. If garlic is chopped up finely it is likely to burn causing a bitter flavor.


Whilst this is roasting, dice the onions and carrots finely. Using a deep pan saute them in the oil and butter over a medium heat until the onions turn translucent and the fat turns golden in color. Add  2 cups of the chicken stock to the pan and the curry paste and continue to simmer.


Once the roasted vegetables are ready add them to the stock (if there is not enough liquid in the pan add the remaining cup of the chicken stock), cover and simmer until the vegetables are soft.  Blitz the soup to a fine puree and add the coconut milk and enough milk to loosen the soup to your desired thickness. Taste the soup and add seasoning if required or more curry paste. To finish the soup off,  finely chop a small handful of cilantro and stir in. Serve with spicy popodoms.


Monday, November 16, 2009

Excitement

The blog page is evolving slowly and I can not wait to start blogging about my kitchen adventures. As much as I have enjoyed writing the cookbook I have felt tied to the recipes that are in it. I have made them untold times to ensure that they always turn out the same with the ingredients stated and I now need to start experimenting with new dishes that are floating around in my head. Ultimately my menu needs to change and I need to be set free!!!

I keep a little notebook with me most of the time whether I am in the house or not and any ideas are scribbled down. A classic example of this was when we were on holiday. I had got some inspiration from our travels and scribbled down recipe ideas on an old parking ticket, which I later transferred to my notebook. Ideas come to me anytime and anywhere. I currently have two pages of ideas that I am eager to try out and with my extended amount of days off it is the perfect opportunity to take advantage.

Todays first official blog recipe is for a French Apple Tart which I made on Sunday after we were craving something sweet. It also happens to be comfort food which is definitely called for on a long lazy weekend. Its simple and quick to make. I use store bought puff pastry but Rachel Allen and Julia Child have a great puff pastry recipe if you want to try it.

French Apple Tart


2 Crunchy Apples
Squeeze of lime juice
2 Tbsp Brown/Golden Sugar
Butter
Puff Pastry
1 Egg Yolk
3 Tbsp Apricot Jam


If using frozen pastry, defrost according to manufacturers instructions. On a floured surface roll out the pastry into a rectangle  approximatley 1/2 cm in depth. Using a knife scour a smaller rectangle 1-2 cm from the edge of the pastry approximatley half way down into the pastry. Place on a baking sheet lined with parchment paper and leave in the refridgerater while you prepare the apples. Cut the apples in quarters and decore. Slice the apples finely and place in a bowl, mix with the lemon juice and coat with the brown sugar. Remove the pastry from the refridgerator and  layer the apples neatly in the smaller rectangle area. Melt enough butter to brush over the apples and the border of the pastry. I also brush the border of the pastry with the whisked egg yolk to give it a golden look once baked. In a preheated oven at 450 degrees bake the tart until the edges rise and turn golden brown and the apples are tender, approx 20 mins. Remove from the oven and allow to cool slightly. Meanwhile melt the jam in a pan until it becomes loose and brush over the apples. Allow this to set before serving. Yum Yum!!!


Friday, November 13, 2009

The light at the end of the tunnel

Yes I can see it, what once was a pin hole is now the size of a crater. Wahooo!!! There are a total of 100 pages. All recipes have been written bar five. The photo pages are filling up nicely and it is looking good.

I have managed to swap my shift at work so that I can spend more time making dishes that need photographing. It is a blessing in disguise really and although I only work four shifts, the two I have done have absolutely wiped me out, not physically, but emotionally (Once a nurse always a nurse!!!). I made the Tomato pesto chicken yesterday but Ian and I were so tired we couldn't manage to get the energy to be creative and take the picture. We just wolfed it down with the left over tomato foccacia I made, which was my pizza dough gone wrong. (I had accidentally put too much water in the mix and it was way to soft, so I added some more olive oil and pushed garlic, tomato slices and basil into the top and it turned out pretty good).


I'm going to have a pastry day soon, I want to try and make the perfect pastry for my chocolate tart. I made my Grandma's but I found it baked too hard, it was more like a biscuit. Once I find the perfect sweet pastry I can start to experiment with different pie fillings too. I have never made a key lime pie so I know that will be on the cards and I also want to try to make creme patissiere. I need to expand my dessert menu. Ian once told me that when he went to Florida he had asked for a slice of key lime and they gave him the whole pie to finish off!!! I think he ended up having it as a dessert for the whole week. I may re-create that for him but on a much smaller scale. I love it when people come round for dinner and they are given their own individual pudding. It makes it look so much nicer and there are no arguments as to who has the bigger serving.

Tuesday, November 10, 2009

The future

After a productive two days in the kitchen and with the book nearly finished (when I say that I  mean well on the way, at least 75% completed) I was wondering what I could do next. I still want to keep the blog going and obviously I need to promote the book, so I was thinking of changing the mission of the blog. As I have had you follow me in my experience of writing the book through the highs and the lows I have now decided to share with you my continuous cooking accomplishments (and failures). Lets concentrate on the former though!!

Since writing the blog I have had people offer their recipes and give advice on what foods compliment each other which has enhanced my knowledge and added to my creativity. I would love to share some recipes with you via the blog and yes I will be writing recipes out. In the past I have given little away but times are a changing and I need to be more interactive with you. I would love to gain some feedback on what you think of the recipes and how they turned out for you. (Maybe another book could be published in the future based on the dishes you most like). Ultimately I want it to be more interactive for both you and me.

I am slowly making changes to the blog and have added  flickr photo stream so you can visualize my dishes and maybe have a go at re-creating them yourselves. I am still in the process of building my profile, so please be patient with me. As we wind down with this year I plan to see next year in with great enthusiasm in regard to my passion for food and I want to share it with you.

Monday, November 9, 2009

Todays Fun

Well I woke up at a stupid ungodly hour to find that no amount of tossing and turning would get me comfortable to get back to sleep, so I hauled my body out of bed, turned on my laptop and began to type my remaining recipes. I can honestly tell you that all the recipes are in from breakfast up until the desserts, this section has only just begun.

I have had the desserts on my mind for a while and have been testing them out checking that my quantities of the ingredients are correct. Today I plan to make my Chocolate Tart, I am going to be using my Grandma's German pastry recipe which is to die for. I must admit though I am not much of a pastry girl. I often find it to claggy and hence never really make it, but this pastry is outstanding. It is buttery yet light and sweet. I remember my Mum asking my Grandma for the recipe, she was making mince pies for Christmas and Grandma's always tasted so much nicer (Sorry Mum!!). Mum obviously agreed otherwise she wouldn't have asked for the recipe, since then Mum's mince pies are just as good as Grandma's.

I have yet to make this pastry as I always used to make a cheesecake base for my chocolate tart, so this is a little experiment. I have been warned though!! this pastry is very short so knowing me I will either make way too much or not enough. The latter in more than likely. The other slight worry I have is that I have to convert the recipe from ounces into cups, which shouldn't be a problem as I use an online converter, however when I did this for my sisters special occasion cookies, I ended up with a baking sheet of uncooked goo. I may well be checking a few online conversion charts. I do not want to screw this one up, It is one of my favorite desserts.

Saturday, November 7, 2009

Restaurant quality!!!!

Ian and I have date nights every two weeks where we do something special together and get out of the old humdrum monotony of routine life. Last night was a toss up between the Lions game or going out for dinner. The lions lost (on more than two occasions!) and we chose right. We found a fantastic French themed restaurant called CRU, not far from home ( www.cru.ca ) that served fresh sophisticated meals. The menu consisted of a selection of small plates which could be served as starters or entrees and a fixed price menu which again gave you 3-4 options for each course. It was wonderful. The atmosphere was chilled and relaxed and the service was outstanding. Each dish was was oozing with taste. I loved the way their menu was set out, it worked so well for the chef. Most restaurants have a huge menu where there is so much choice that  the quality of the food becomes compromised. At CRU though high quality was maintained and thought went into preparing every dish that was presented to us. The best compliment I received (which would be taken as a negative by the restaurant) was when Ian said my pork belly was tastier than theirs. I was smiling from ear to ear. Watch out CRU!!!


The presentation of the food has given me further inspiration on how to set up food photos for the book. I love to keep food simple and presentation is the key. Why spend the time cooking it ensuring it tastes so good to have no thought go into the presentation. The photo is marketing your food, you want it to look appetizing and desirable. I always like to serve food on a plain colored plate, rather than an over decorated plate. Accents can be added to the table to get the desire effect. For example using a different colored base plate and then adding a plain food plate on top. Let the food do the talking

Thursday, November 5, 2009

Preserving food

For a while now I have been thinking that of ways to preserve food. I have made jams before, but I would love to try canning and drying foods. In the future I plan to grow my own vegetables so learning to preserve food will be beneficial to me. I have read and watched programs on how to to preserve some foods but now I have to do it for real. My only concern is once canned or preserved how long will they last for. I suppose I will find this out with experience.


I am going to start with canning my baked beans and tomato sauce and if we catch any fish on our adventures I will have a go at canning them too (All our fish so far have been way to small to eat). I know that I will need to purchase a pressure cooker to help seal the cans so that will be the next outlay. A friend at work tried canning for the first time this year, so I shall have to ask her what issues she had if any. I would also like to try making my own salami, but I will start of with the canning first.


I have be experimenting with making oven roasted tomatoes, it is such a great way of using up excess tomatoes. My sister gave me a great recipe for chicken in a tomato pesto sauce and I have wanted to make my own tomato pesto for a while. I often make basil pesto, so I knew that I could adopt the same principles for the tomato pesto. Last week I headed down to Granville Island and picked up a huge bag of tomatoes from the discount bin for a dollar. I threw away any soft split tomatoes, but to be honest there was probably about two that were unsuitable. With the others I cut them in half, coated them in oil, sprinkled them with a little sea salt and  spread them out on a baking sheet before slow roasting them in a preheated oven at 200 degrees for 8 hours. Yes I know that is a long time but I did not want them to burn. I allowed them to shrink to half there size and become wrinkly. I originally thought that they would have a chewy consistency throughout, a little like the store bought sun dried tomatoes but my tomatoes turned out chewy but moist and the flavor was to die for. They were sweet like candy and the tomato flavor was intense, perfect for a tomato pesto.

Tomato Pesto

20 Halves Oven roasted tomatoes
2 tbs Tomato paste
Handful of Basil
Parmesan
Olive oil
Pine nuts
Garlic
S&P

(When using these ingredients add them to your personal taste) Firstly blitz the tomatoes and strain if there is too much juice present. Place back into the blender and add the remaining ingredients,. Use the oil to thin the mixture to a nice consistency and add salt and pepper to taste. Et voila. This can keep in the fridge for up to a week. Its great to use as spreads  as well as in pasta.


Wednesday, November 4, 2009

Christmas


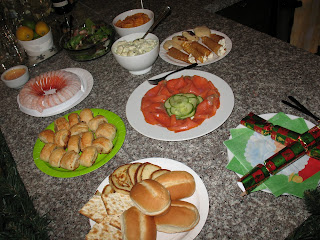
That dreaded question came two days ago. What are we doing for Christmas? This related to buying gifts for our relatives in the UK. Originally I was going to give our relatives a copy of the cook book I am developing, however this is not going to happen as I have much more work to do. Our other back up plan also would not work. When we lived in England we always laid on the Christmas buffet, usually on Christmas eve, where family would enjoy a feast of sumptuous food. This was our back up plan. Ian's whole family would attend, even his sister and brother in law who live in Germany. The pressure was on (there was no pressure), I loved it. I would always plan the buffet months before Christmas. (I am in that process now). On our first Christmas buffet Ian was in charge of the alcohol and me the food. I would tell him what was on the menu and he would match the wine and liquor. There was champagne, a selection of wines, whiskey, brandy and port. Excellent. I served two platters,  the first being roasted ham with a maple and orange glaze served with pigs in blankets and the second was roasted trout with a selection of seafood. My father used to provide us with the trout as he is a keen fisherman, so our freezers were always filled with this edible delight. There were other plates of Stilton cheese, balsamic glazed onions, baby tomatoes and baskets of bread. My mums fruity Christmas cake was always served at the buffets and often taken home by Ian's parents. You can make buffets as simple or complicated as you like, the second buffet was a lot less elaborate but just as tasty.


When we used to visit my parents for Christmas, I  would always get involved in the kitchen and assist mum. Although mum would have fully planned the Christmas dinner, we would always discuss what we would serve. She would always ask my opinion and often the starter would change from the original idea. I love to eat my Mums Christmas dinners and one year my brother in law ate two of mums Christmas dinners.


Anyway this does not answer the original question. What are we doing for Christmas?, that I don't know. In regard to friends I would love to invite them around for a Christmas buffet. Roll on Christmas.

Monday, November 2, 2009

November

I can not believe it is November already. Where has this year gone? I started the book project in August and now it is nearly the end of the year. The next big event is Christmas. I am not even going to start talking about Christmas, I think I will have to dedicate a whole post to Christmas nearer the time. I can tell that we are heading into winter though, all the gorgeous autumnal colors are beginning to fade and bare branches are beginning to show.  Our food menu at home is also showing signs of winter, there are less salads appearing on the menu and more comfort food is starting to show. This is the best time of year for me, in fact to be honest every season seems to be the best time of year for me. Each season brings new foods, recipes and tastes. I love them all!!!

Since my last post I have been battling with the front cover, it is not turning out as well as I had anticipated. I planned to use a wrap around photo, however the photo is too short and if stretched the picture will be ruined. A little more work is needed. I may have to zoom in on the photo or use two separate photos for the front and the back cover. We will just have to see. I am also unsure of the title, I thought that I could use the blog title 'THIS IS IT' but then I quickly realized that that is Michael Jackson's movie title. Would I have copyright issues? and who am I compared to Michael Jackson. The pressures!!!!!

On a positive note though my poached pears turned out awesome, they were tender and sweet and the sauce made from the poaching liquor was divine. It wasn't too strong and it worked really well with the vanilla ice-cream. There was no real difference in taste between the pears. All the pears worked well, however the barlett pears did need to poach a little longer to get tender. I would advise to use the same pears if poaching a few at a time and keep turning the pears during the poaching period. This stops the flesh from oxidizing and turning a reddish brown color.